Arduino is a popular open-source electronics platform based on easy-to-use hardware and software. It’s intended for anyone making interactive projects. Whether you’re a beginner or an experienced engineer, assembling your own Arduino kit can be an exciting and Arduino is a popular open-source electronics platform based on easy-to-use hardware and software. It’s intended for anyone making interactive projects. Whether you’re a beginner or an experienced engineer, assembling your own Arduino kit can be an exciting and rewarding endeavor. This article will guide you step by step through the process of putting together your Arduino kit and highlight the essential components you’ll need.
Understanding Arduino
Before assembling your kit, it’s crucial to understand what Arduino is and what it can do. Arduino boards are microcontrollers that can be programmed to control various electronic components such as LEDs, motors, sensors, and more. They are widely used in robotics, home automation, and many other applications.
Essential Components of an Arduino Kit
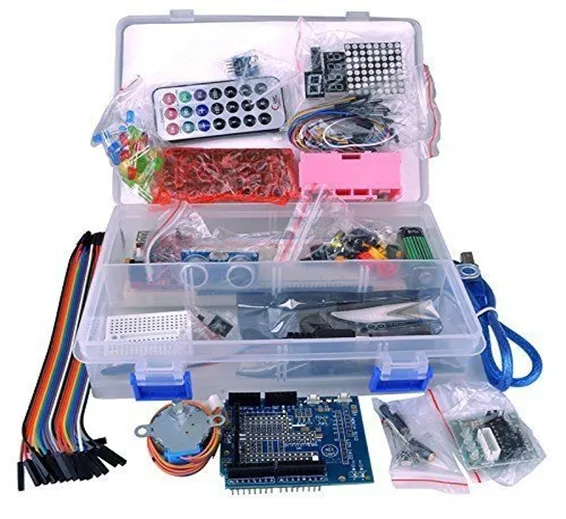
To start your Arduino journey, you’ll need to gather the following components:
Arduino Board: The core of your kit. The Arduino Uno is a popular choice for beginners.
Breadboard: A board for prototyping circuits without soldering.
Jumper Wires: Used to connect components on the breadboard.
Resistors: Essential for controlling the flow of current in your circuits.
LEDs: Basic components to learn circuit design and programming.
Push Buttons: Useful for creating interactive projects.
Servo Motors: For projects requiring movement or rotation.
Step-by-Step Assembly Guide
Here’s a simple guide to assembling your own Arduino kit:
Step 1: Gather Your Components
Start by collecting all the components listed above. You can purchase them separately or as part of a starter kit. Consider Arduino shields purchase for additional functionalities and ease of use.
Step 2: Set Up the Breadboard
Place your breadboard on a flat surface. Connect the power and ground rails to your Arduino using jumper wires. This setup will allow you to power your components directly from the Arduino board.
Step 3: Connect the Arduino Board
Connect your Arduino board to your computer using a USB cable. This connection will power the board and allow you to upload programs to it.
Step 4: Start with a Basic Circuit
Begin by creating a simple circuit, such as lighting up an LED. Connect a resistor and an LED to the breadboard, then use jumper wires to connect them to the Arduino. Upload a basic LED blink program to test your connections.
Step 5: Experiment and Expand
Once you’ve mastered the basics, experiment with more complex projects. Utilize sensors, motors, and other modules to expand your kit’s capabilities. The Arduino community offers countless tutorials and resources online to inspire your projects.
Conclusion
Assembling your own Arduino kit is a fantastic way to dive into the world of electronics and programming. With the right components and a bit of creativity, you can create a myriad of projects and gain a deeper understanding of how electronic systems work. Remember, the key to success is practice and experimentation. Happy building!
rewarding endeavor. This article will guide you step by step through the process of putting together your Arduino kit and highlight the essential components you’ll need.
Understanding Arduino
Before assembling your kit, it’s crucial to understand what Arduino is and what it can do. Arduino boards are microcontrollers that can be programmed to control various electronic components such as LEDs, motors, sensors, and more. They are widely used in robotics, home automation, and many other applications.
Essential Components of an Arduino Kit
To start your Arduino journey, you’ll need to gather the following components:
Arduino Board: The core of your kit. The Arduino Uno is a popular choice for beginners.
Breadboard: A board for prototyping circuits without soldering.
Jumper Wires: Used to connect components on the breadboard.
Resistors: Essential for controlling the flow of current in your circuits.
LEDs: Basic components to learn circuit design and programming.
Push Buttons: Useful for creating interactive projects.
Servo Motors: For projects requiring movement or rotation.
Step-by-Step Assembly Guide
Here’s a simple guide to assembling your own Arduino kit:
Step 1: Gather Your Components
Start by collecting all the components listed above. You can purchase them separately or as part of a starter kit. Consider Arduino shields purchase for additional functionalities and ease of use.
Step 2: Set Up the Breadboard
Place your breadboard on a flat surface. Connect the power and ground rails to your Arduino using jumper wires. This setup will allow you to power your components directly from the Arduino board.
Step 3: Connect the Arduino Board
Connect your Arduino board to your computer using a USB cable. This connection will power the board and allow you to upload programs to it.
Step 4: Start with a Basic Circuit
Begin by creating a simple circuit, such as lighting up an LED. Connect a resistor and an LED to the breadboard, then use jumper wires to connect them to the Arduino. Upload a basic LED blink program to test your connections.
Step 5: Experiment and Expand
Once you’ve mastered the basics, experiment with more complex projects. Utilize sensors, motors, and other modules to expand your kit’s capabilities. The Arduino community offers countless tutorials and resources online to inspire your projects.
Conclusion
Assembling your own Arduino kit is a fantastic way to dive into the world of electronics and programming. With the right components and a bit of creativity, you can create a myriad of projects and gain a deeper understanding of how electronic systems work. Remember, the key to success is practice and experimentation. Happy building!